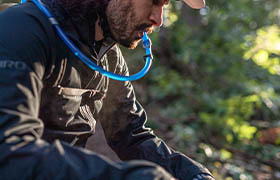
The first step to keeping your reservoir clean is to empty out and dry it after every ride. Every few rides, we suggest sanitizing your reservoir using our all-in-one cleaning kit with brush, cleaning tabs and hanger clip. Pro tip from CamelBak athlete Eric Porter – if you can’t dry it all the way, store your reservoir in the freezer after cleaning to prevent any bacteria from growing before your next ride. Watch as Eric demonstrates reservoir cleaning techniques.
Yes. You can freeze your reservoir between uses to prevent bacteria growth. For extra hot days on the trail, you can even freeze your reservoir with water in it to ensure you have cold water throughout your ride (or run or hike). The below video features CamelBak athlete Eric Porter’s plan-ahead hydration hack for keeping liquid cold on a long, hot ride.
No matter the temperature, it’s important to stay hydrated. At cold enough temperatures, the water in your tube can freeze, making it impossible to drink from your pack.
One option is to swap out your Crux® reservoir with a StoAway insulated hydration bladder to turn any pack into an all-season hydration pack or to grab one of our insulated snow hydration packs.
The Crux reservoir that came with your favorite hydration backpack can also be winterized: simply replace the hose and install the Crux Thermal Control kit (only compatible with reservoirs that include Quicklink™), with insulated tube and Freeze-Proof Valve. CamelBak athlete Eric Porter shows how to insulate your tube and valve to keep the water from freezing in harsh winter conditions. Plus, more hacks and tips to keep the water in your hydration pack flowing on frozen adventures.
Fusion Reservoirs
The Fusion reservoirs should be stored dry with the zipper in the closed position. We recommend washing and drying after each use. Failure to store your Fusion reservoir with the zipper closed can result in leaking.
- PRO TIP : shove a paper towel in the reservoir before zipping up to absorb any excess moisture that may be left in the reservoir.
- PRO TIP: store your empty reservoir in the freezer as an extra layer of protection from the chance of bacteria build up.
It’s important to always keep the zipper in the fully closed position during storage. Because the zipper is waterproof, it is extremely secure and may require a little force to operate. Don’t be afraid to give it a good tug when initially opening. It will become easier to open and close with repeated use. Lubrication can also be applied to the zipper – we recommend a food safe silicone based lubricant.
Crux Reservoirs
If you’re having difficulty with your Crux® reservoir leaking, the issue may be that the lid hasn’t properly sealed. The most important part of getting a good seal is ensuring that the threads of the reservoir lid are lined up properly before screwing the lid closed. The simplest way to do this is to put the lid on and then turn counterclockwise until you hear a click as the threads line up properly. Once you hear the click, turn the lid clockwise until tight. Then you should have the perfect seal.
Watch CamelBak athlete Eric Porter’s video below for a great step-by-step guide on how he gets the perfect seal on the hydration bladder every time.
If you’re having issues with leaking from somewhere other than the bladder lid, you can check out our Got Your Bak Warranty to learn more and process a claim.
Other
To remove the tube from the reservoir (or to take off the bite valve), soak the end of the reservoir with the tube connection in hot water for 5 to 10 minutes. This should soften the plastic and make it easier to pull the tube off. You can use the same trick to reattach the tube or bite valve: soak everything in warm water before pushing the parts back together. Once the plastic cools, it will firm up and seal itself more securely.
If you have an older reservoir (like an Omega or Antidote constructed with a standard exit port), you can install a Quicklink conversion kit to make it compatible with newer reservoir accessories like filters, flow meters, and insulated drinking tubes. Here’s how to attach the Quicklink components to your reservoir:
- Cut the drinking tube 2"-3" from the base of the reservoir.
- Moisten the bottom threads of the Quicklink with rubbing alcohol and insert into the smaller tube with force. Do the same thing for the drink tube.
- Unclick to fill and load reservoir, click in to drink.


